
How to Build an Affiliate Website on WordPress: A Step-by-Step Setup Guide (2026)
By Oscar · 14 min read
Affiliate Disclosure: AffiliateCrownd earns a commission when you sign up for SiteGround, Cloudways, Systeme.io or ShortPixel through our links, at no extra cost to you. We list prices and terms only where we checked them on official pages, and we say when we did not. Read our full disclosure.
To build an affiliate website on WordPress, you choose a narrow niche, register a domain, buy hosting, install WordPress, add a fast theme and a few trust pages, and then publish helpful articles with honest, disclosed links. The technical setup takes a few hours. The part that takes months is publishing content people trust.
This guide walks through each step in order, explains the choices that matter, and gives you a launch checklist. It is written for a complete beginner and assumes no coding. We say where prices change, because they do, and we avoid made-up income or traffic numbers.
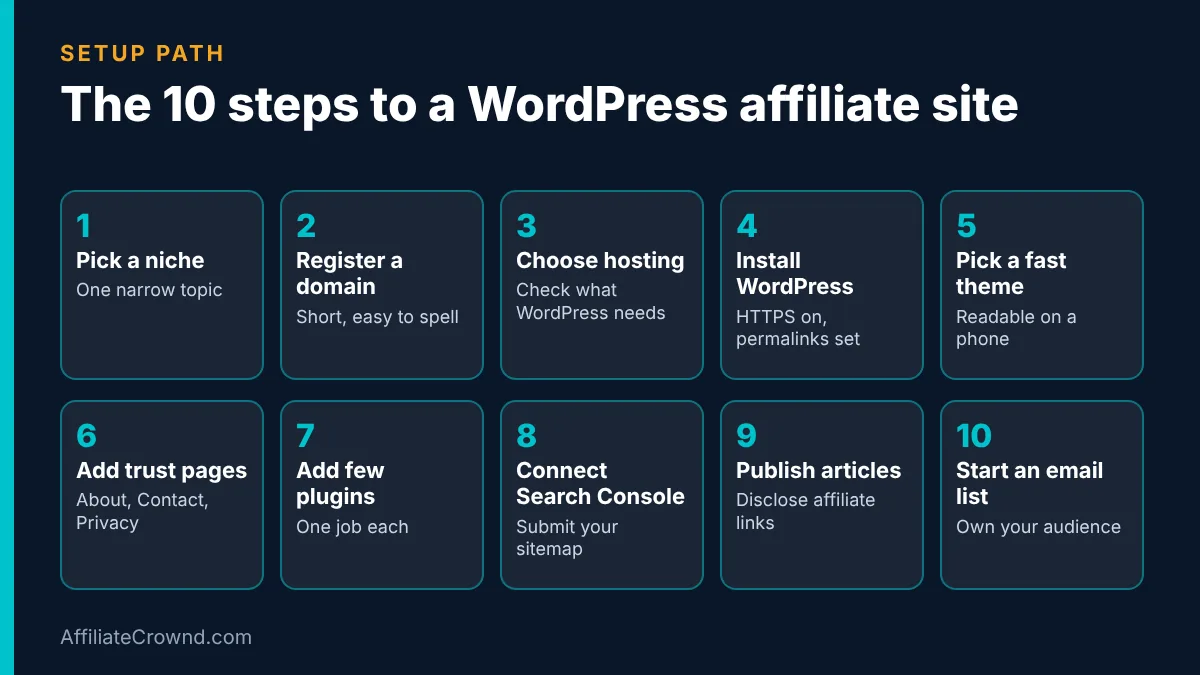
The 10 Steps at a Glance
| Step | What you do | Time to expect |
|---|---|---|
| 1 | Pick one narrow niche | An evening of thinking |
| 2 | Register a domain name | 10 minutes |
| 3 | Choose and buy hosting | 30 minutes |
| 4 | Install WordPress and turn on HTTPS | Often one click, check with your host |
| 5 | Pick a fast, simple theme | 1 hour |
| 6 | Create the trust pages | 2 hours |
| 7 | Install only the plugins you need | 1 hour |
| 8 | Connect Search Console and analytics | 30 minutes |
| 9 | Publish your first helpful articles | Ongoing |
| 10 | Start an email list | 1 hour |
Get our free launch checklist → It follows the same order, so you can tick steps off on your phone.
Step 1: Pick One Narrow Niche
A niche is the topic your site is about. Narrow beats broad. “Technology” is too wide to rank for. “Project management software for freelancers” is a niche you can cover properly. Check three things before you commit: you can explain the topic, people search for it, and products with affiliate programs exist for it.
Then look at the programs. A site about hosting and websites can use hosting programs. A site about email can use email tools. Our guide to the best affiliate programs for beginners shows how to compare commissions, cookies and payout rules before you join.
A Quick Way to Test a Niche (Worked Example)
Here is a simple test you can run in an evening. The example below is an illustration of the method, not data about a real market.
| Question | Example niche: email tools for small creators | What a weak answer looks like |
|---|---|---|
| Can you explain it? | Yes: you can compare features and limits from official pages. | You would have to guess what the product does. |
| Do people search for it? | Type the question into Google and see related searches and suggestions. | No related searches, or only very broad ones. |
| Are there programs to join? | Several email tools run affiliate programs. Read each one’s terms before you apply. | No program, or terms you cannot confirm. |
| Can you write ten articles? | Reviews, pricing guides, comparisons, how-tos and alternatives give plenty of angles. | You run out of ideas after two. |
If you can answer yes to all four, the niche is worth a try. If not, narrow it or pick another before you spend money on hosting. Changing a niche on paper is free, and changing it after six months of writing is not.
Step 2: Register a Domain Name
Your domain is your web address. Keep it short, easy to say and easy to spell, and avoid hyphens and numbers. A brand-style name is more flexible than one stuffed with keywords, because it still works if your topics grow. Prices vary by extension and registrar, and renewal prices can be higher than the first year, so check the renewal price before you buy.
Step 3: Choose Hosting
Hosting is the computer that stores your website. For a new WordPress site you want three things: easy setup, good speed and reliable support. Two options we cover in our programs guide are SiteGround and Cloudways.
| Host | Described as | Better for |
|---|---|---|
| SiteGround | Beginner-friendly host that many people choose for a first WordPress site | First-time website builders |
| Cloudways | Managed cloud hosting, popular with WordPress users who outgrow basic shared hosting | People who want more control and performance |
What WordPress Itself Asks of a Host
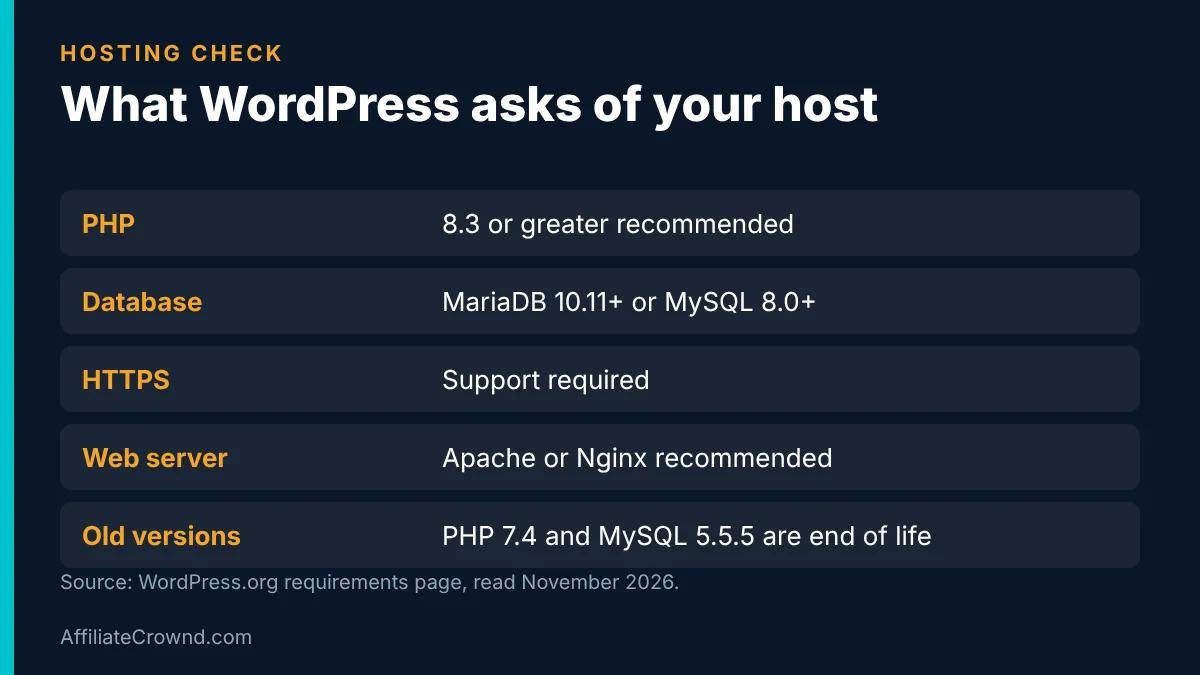
Before you compare prices, check that the host meets what WordPress.org recommends. On its requirements page, WordPress recommends that your host supports PHP 8.3 or greater, MariaDB 10.11 or greater (or MySQL 8.0 or greater) and HTTPS. It recommends Apache or Nginx as the web server, although any server that supports PHP and MySQL will work. The page also warns that older versions, such as PHP 7.4 and MySQL 5.5.5, have reached end of life and may expose your site to security vulnerabilities.
You do not need to understand these terms in depth. You only need to ask the host the right questions. Use this list on a host’s pricing page, in its chat or in an email:
- Which PHP version will my WordPress site run on, and can I update it?
- Is a free HTTPS certificate included?
- How are backups handled, and how do I restore one?
- What is the renewal price after the first term?
- What is the refund policy, and how many days does it cover?
- How do I contact support, and is WordPress support included?
Write down the answers for each host you consider. If a host cannot answer a basic question clearly, that is useful information too.
We have not run a long-term speed test of either host, so we do not rank them by speed. Compare the current plans and prices on each official site, and read the refund terms before you pay. For most beginners, the simpler option is the safer first choice, and you can move later.
See SiteGround hosting plans → A fit if you are building your first website. Check current prices on the official site.
Step 4: Install WordPress and Turn On HTTPS
Most hosts install WordPress for you from their control panel. After it is installed, do four things straight away:
- Turn on HTTPS. Your address should start with https. Most hosts offer a free certificate.
- Set your permalinks to a readable format, such as the post name, before you publish anything. Changing them later breaks links.
- Delete the sample post and page that WordPress creates.
- Use a strong, unique password for your admin login, and turn on two-step login if your host offers it.
Security and Speed Basics Right After Install
A new WordPress site is a target for automated login attempts from day one, and slow pages lose readers. These habits cost almost nothing and prevent the most common problems:
| Habit | Why it matters | How to do it |
|---|---|---|
| Keep WordPress, themes and plugins updated | Updates fix security problems. WordPress.org itself warns that old software versions can expose a site to vulnerabilities. | Check the Updates screen weekly, or turn on automatic updates where your host allows it. |
| Delete what you do not use | Unused plugins and themes still add risk. | Deactivate and delete anything you are not using. |
| Use a strong, unique admin password | Weak passwords are an easy way in. | Use a password manager and turn on two-step login if your host offers it. |
| Keep backups you can restore | A backup you cannot restore is not a backup. | Ask your host how backups work and try one restore before you need it. |
| Compress images | Large images slow every page that uses them. | Resize before upload, or use a tool such as ShortPixel, and check its current limits first. |
Step 5: Pick a Fast, Simple Theme
The theme controls how your site looks and how fast it loads. Choose a lightweight theme with a clean layout, readable text and a menu that works on a phone. Avoid themes that load many animations or heavy page builders, because they slow every page. Use the same colors and fonts across the whole site, so it feels like one brand.
Test on your own phone, since most readers will use one. Tap every menu item, scroll every table, and check that buttons are easy to press with a thumb.
Step 6: Create the Trust Pages
Readers, and review systems such as ad networks, look for signs that a real person runs the site. Create these pages before you publish your first article:
- About: who you are, why you write about this topic and how the site earns money.
- Contact: a way to reach you.
- Privacy Policy: what data the site collects. Use a generator or a lawyer for the text.
- Affiliate Disclosure: a plain statement that some links earn you a commission. In the United States, the Federal Trade Commission expects clear disclosure. See ours as an example on our disclosure page.
- Start Here: a guide that points new readers to your best content, like our Start Here page.
Step 7: Install Only the Plugins You Need
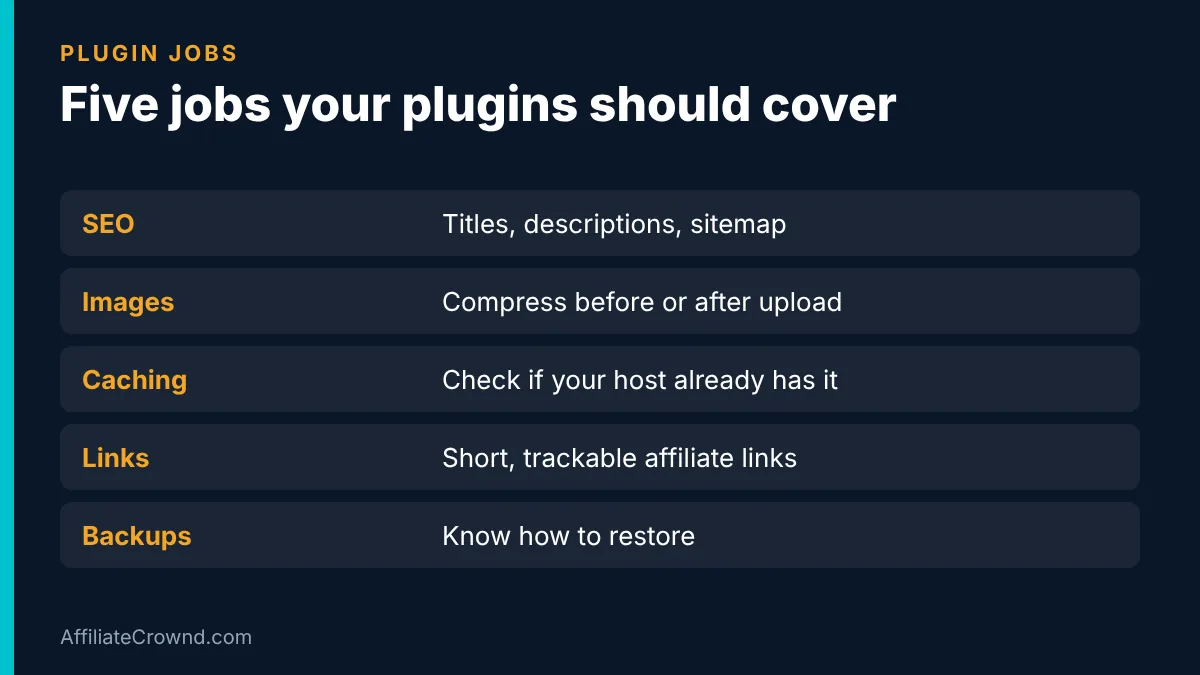
Every plugin adds code that can slow the site or create security risks, so keep the list short. A beginner site usually needs only these jobs covered:
| Job | What it does | Our note |
|---|---|---|
| SEO | Titles, descriptions, sitemaps | One SEO plugin is enough. Do not run two. |
| Image compression | Makes images smaller so pages load faster | See our ShortPixel review, or compress images before you upload. |
| Caching | Stores pages so they load faster | Many hosts include caching. Check before you add a plugin. |
| Link management | Short, trackable affiliate links | Short links such as /systeme.io make links easier to manage and update. |
| Backups | Lets you restore the site | Many hosts include daily backups. Confirm yours. |
Try ShortPixel free → It compresses images automatically. Check the current free and paid limits on the official site.
Step 8: Connect Google Search Console and Analytics
Google Search Console is free and shows which searches bring people to your site and whether Google can read your pages. Add your site, verify it, and submit your sitemap. After you publish a new article, you can ask Google to look at it. Analytics shows what visitors do after they arrive. You need both to learn which pages earn clicks and which only get read.
Search Console in Four Simple Moves
- Add your site as a property in Search Console and choose the option that matches your address, with or without www.
- Verify that you own it. Search Console offers several ways to prove ownership, and your SEO plugin or host often has a simple field for the code it gives you.
- Submit your sitemap. Most SEO plugins create one automatically. Paste its address into the Sitemaps report.
- Check back weekly. Look at which searches show your pages and which pages Google could not read, then fix those first.
New sites show very little data at first, and that is normal. Do not judge your site by its first weeks. Use the early reports to spot errors, such as pages Google cannot reach, and to learn the exact words people use when they find you. Those words are the best source for your next article titles.
Step 9: Publish Helpful Articles
Content is what ranks and earns. Start with the four kinds of page that readers use when they are deciding:
- Reviews of products you have used.
- Comparisons of two tools, such as Systeme.io vs ClickFunnels.
- Best-of lists that help readers choose.
- How-to guides that solve a specific problem.
Write from experience, show the limits as well as the strengths, and put a short disclosure near the top. Link related articles to each other so readers and Google can find them. Be patient: search traffic usually takes months to arrive, and many beginners earn little at first.
Step 10: Start an Email List
Search traffic can drop after an update, and an email list is an audience you own. Offer a free resource, collect addresses with a simple form, and send useful tips. Systeme.io has a free plan with funnels and email, and our Systeme.io review and pricing guide explain what it includes.
Start free with Systeme.io → No credit card needed. Confirm the current plan limits on the official site.
Your First 30 Days (A Suggested Pace)
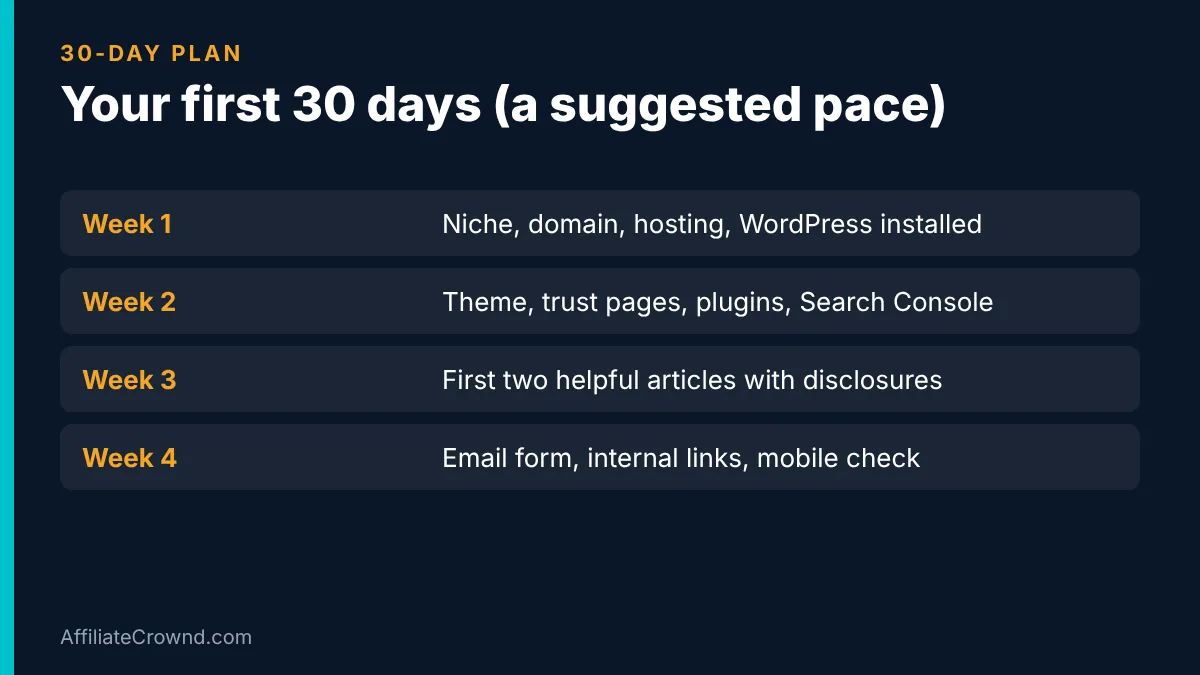
Setup is a few hours of work, but it helps to spread it over a month so you do not rush the parts that build trust. This pace is our suggestion, not a rule, and you can move faster or slower.
| Week | Focus | Done when |
|---|---|---|
| Week 1 | Niche, domain, hosting, WordPress installed | Your site opens over HTTPS and the sample content is deleted. |
| Week 2 | Theme, trust pages, plugins, Search Console | About, Contact, Privacy and disclosure pages are live and the sitemap is submitted. |
| Week 3 | First two helpful articles | Each has a disclosure near the top, compressed images and links to related pages. |
| Week 4 | Email form, internal links, mobile check | You have tested the form, every menu link works and tables fit a phone. |
How to Write Your First Article
A new site needs a few finished articles more than it needs many unfinished ones. Use this routine for each one:
- Pick one question a reader would ask. For example, “Which email tool is free for beginners?” is clearer than “email marketing”.
- Check the official sources. Read the product’s own pricing and feature pages so your numbers match what is live today.
- Answer in the first paragraph. Give the short answer first, then explain.
- Show the limits. Say who the product is not for. This builds trust faster than praise does.
- Add a disclosure near the top and use rel=”nofollow sponsored” on affiliate links.
- Link to two or three related pages on your own site, such as our beginner programs guide or Systeme.io review, so readers keep exploring.
- Compress the images and write alt text that describes what the image actually shows.
- Read it on your phone before you publish.
For the longer picture of how affiliate income works and what to expect, read our beginner’s guide to affiliate marketing. If you plan to show ads as well, see our guide to getting Google AdSense approved.
Launch Checklist
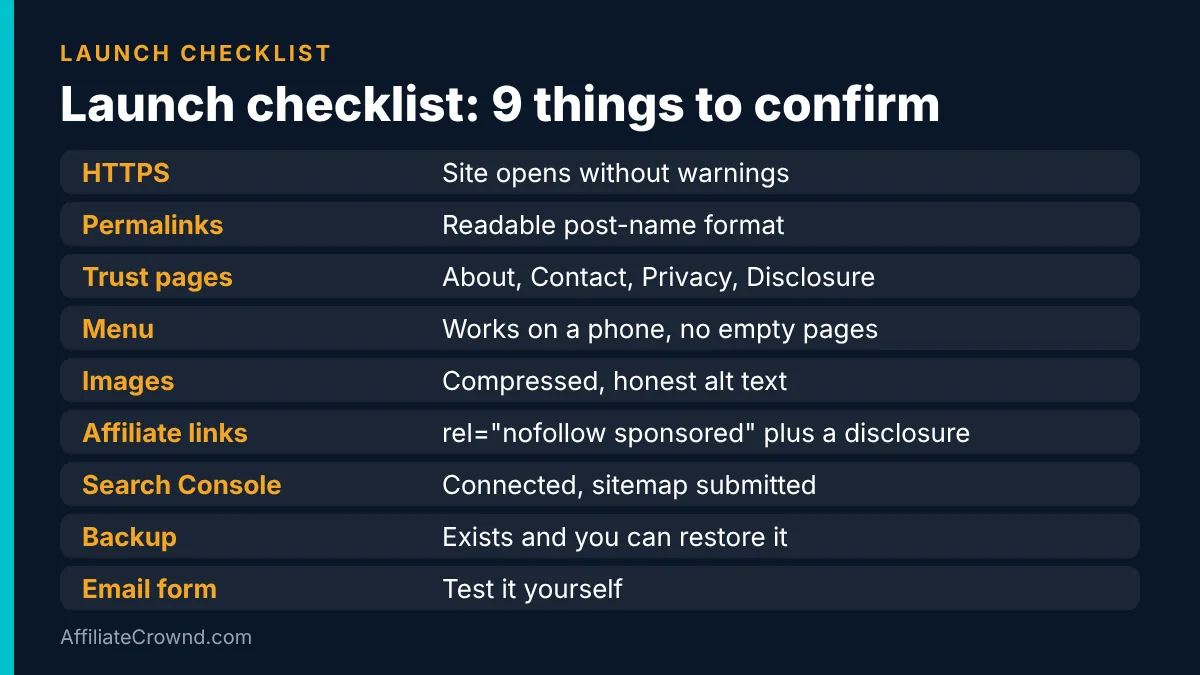
- HTTPS is on and the site opens without warnings.
- Permalinks are set to a readable format.
- About, Contact, Privacy Policy, Affiliate Disclosure and Start Here pages are live.
- The menu works on a phone, and every menu link leads to real content.
- Images are compressed and have honest alt text.
- Affiliate links use rel=”nofollow sponsored” and each article has a disclosure.
- Search Console is connected and the sitemap is submitted.
- A backup exists and you know how to restore it.
- Your email form works when you test it.
Common Setup Mistakes
- Starting too broad. A narrow niche is easier to rank for.
- Installing too many plugins. More code means a slower, riskier site.
- Skipping the trust pages. Readers and review systems look for them.
- Publishing empty categories. A category with no articles looks unfinished. Fill it or hide it.
- Ignoring mobile. Check every page on a phone.
- Forgetting the disclosure. Tell readers when a link earns you money.
What You Will Pay For (Cost Categories, Not Made-Up Prices)
Prices for domains, hosting and tools change often, and renewal prices can be higher than the first-year price, so we do not print numbers we have not checked today. What stays true is the list of things you pay for. Use this table to build your own budget, then confirm every price on the official site before you buy.
| Cost | How it is usually billed | What to check before you pay |
|---|---|---|
| Domain name | Yearly | The renewal price, not only the first-year price. Whether privacy protection is included. |
| Hosting | Monthly or yearly plans | The renewal price, the refund terms, backups and whether WordPress is supported. Compare SiteGround and Cloudways on their official pages. |
| Theme | Free, or a paid license | Whether updates are included and how fast the theme loads on a phone. |
| Plugins | Many are free, some are paid | Whether you really need it. Each plugin adds code to every page. |
| Image compression | Free tier or paid plan | Current limits on the official page. See our ShortPixel review or compress before upload. |
| Email tool | Free plan or monthly plan | Contact limits and features on each plan. Systeme.io has a free plan, and our pricing guide shows what each paid plan adds. |
The honest budget rule: start with the smallest setup that works, keep the receipts, and upgrade only when a real limit gets in your way, such as slow pages or a full email list. Your time is the largest cost, and no tool replaces publishing useful articles.
Affiliate Website Setup: FAQ
How much does it cost to start an affiliate website?
You need a domain and hosting at minimum, plus time. Prices change and renewals can cost more than the first year, so check the current prices on your registrar and host before you buy. Many affiliate programs are free to join.
Do I need to know how to code?
No. WordPress, themes and plugins are set up through menus. You may paste a code snippet for analytics or ads, but you can follow the instructions the tool gives you.
Which is better for beginners, SiteGround or Cloudways?
SiteGround is described as beginner-friendly, and Cloudways as better for people who want more control. We have not benchmarked either, so compare current plans and refund terms on their official sites.
How long until my site earns money?
It varies widely, and many beginners earn little or nothing for the first months while they publish and build trust. We do not promise a figure. Our beginner’s guide to affiliate marketing covers realistic expectations.
Can I add Google AdSense to my site?
Yes, if your site meets Google’s requirements. See our guide to getting Google AdSense approved for what Google asks for and how long it can take.
Final Takeaway
A good affiliate site is simple: a narrow niche, fast hosting, a clean theme, clear trust pages and honest articles. Do the ten steps in order, use the checklist before you launch, and then spend your time on content. Next, pick a program with our programs guide, or see how we lay out the path on the Start Here page.
Written by Oscar, founder of AffiliateCrownd. Tools and prices change, so confirm current details on each official site before you buy.